
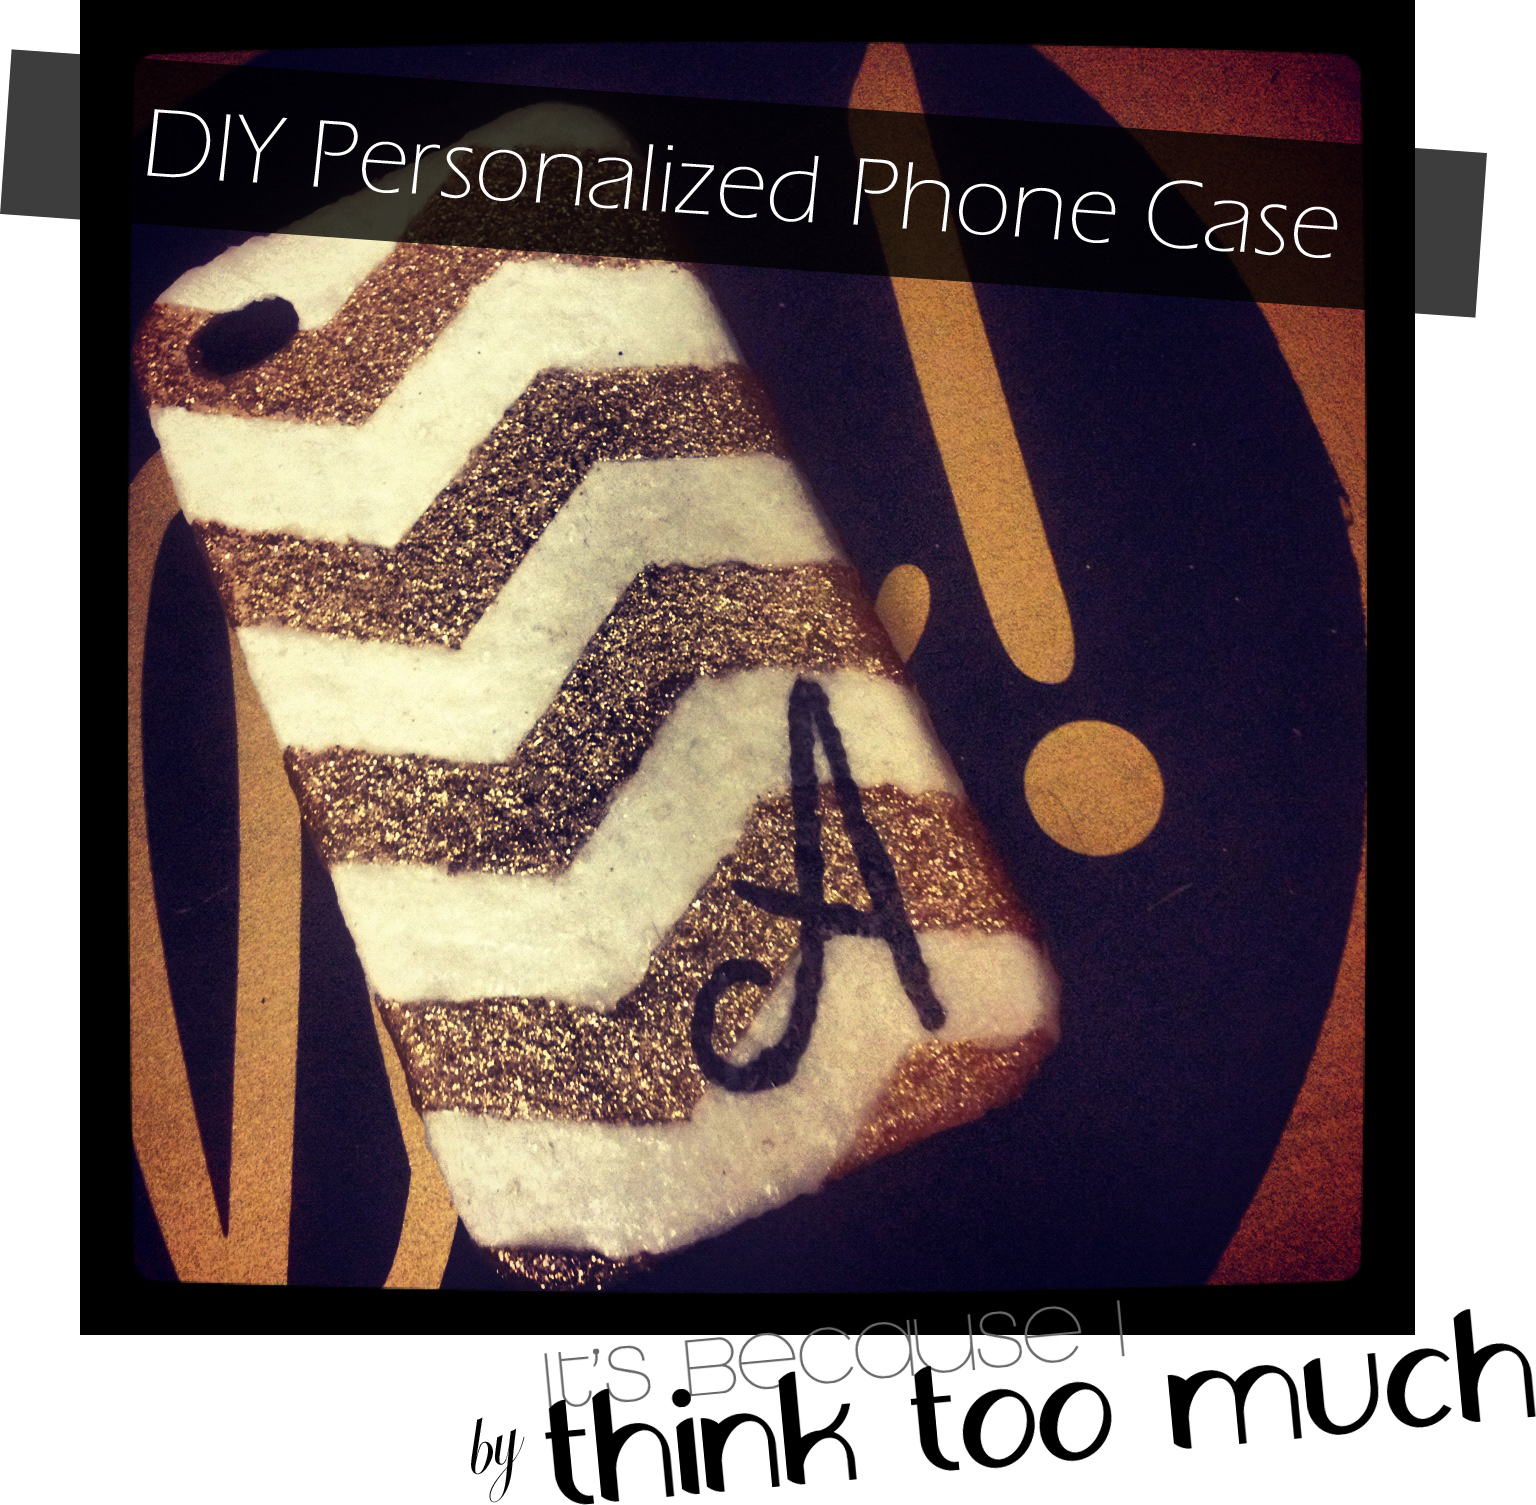
This whole thing started when I saw a really rad phone case on Target's site. It was white and gold chevron stripes and it had to be mine. I ran right over to the closest Target to pick it up, but when I found it, I was disappointed to realize that it was a case for the iPhone 5 and wouldn't fit my phone.
We live in the world of instant gratification and I needed to have a white and gold chevron case for my phone. On my drive home I realized I had everything I need to make my own at home--including an old phone case that was in desperate need of a makeover.
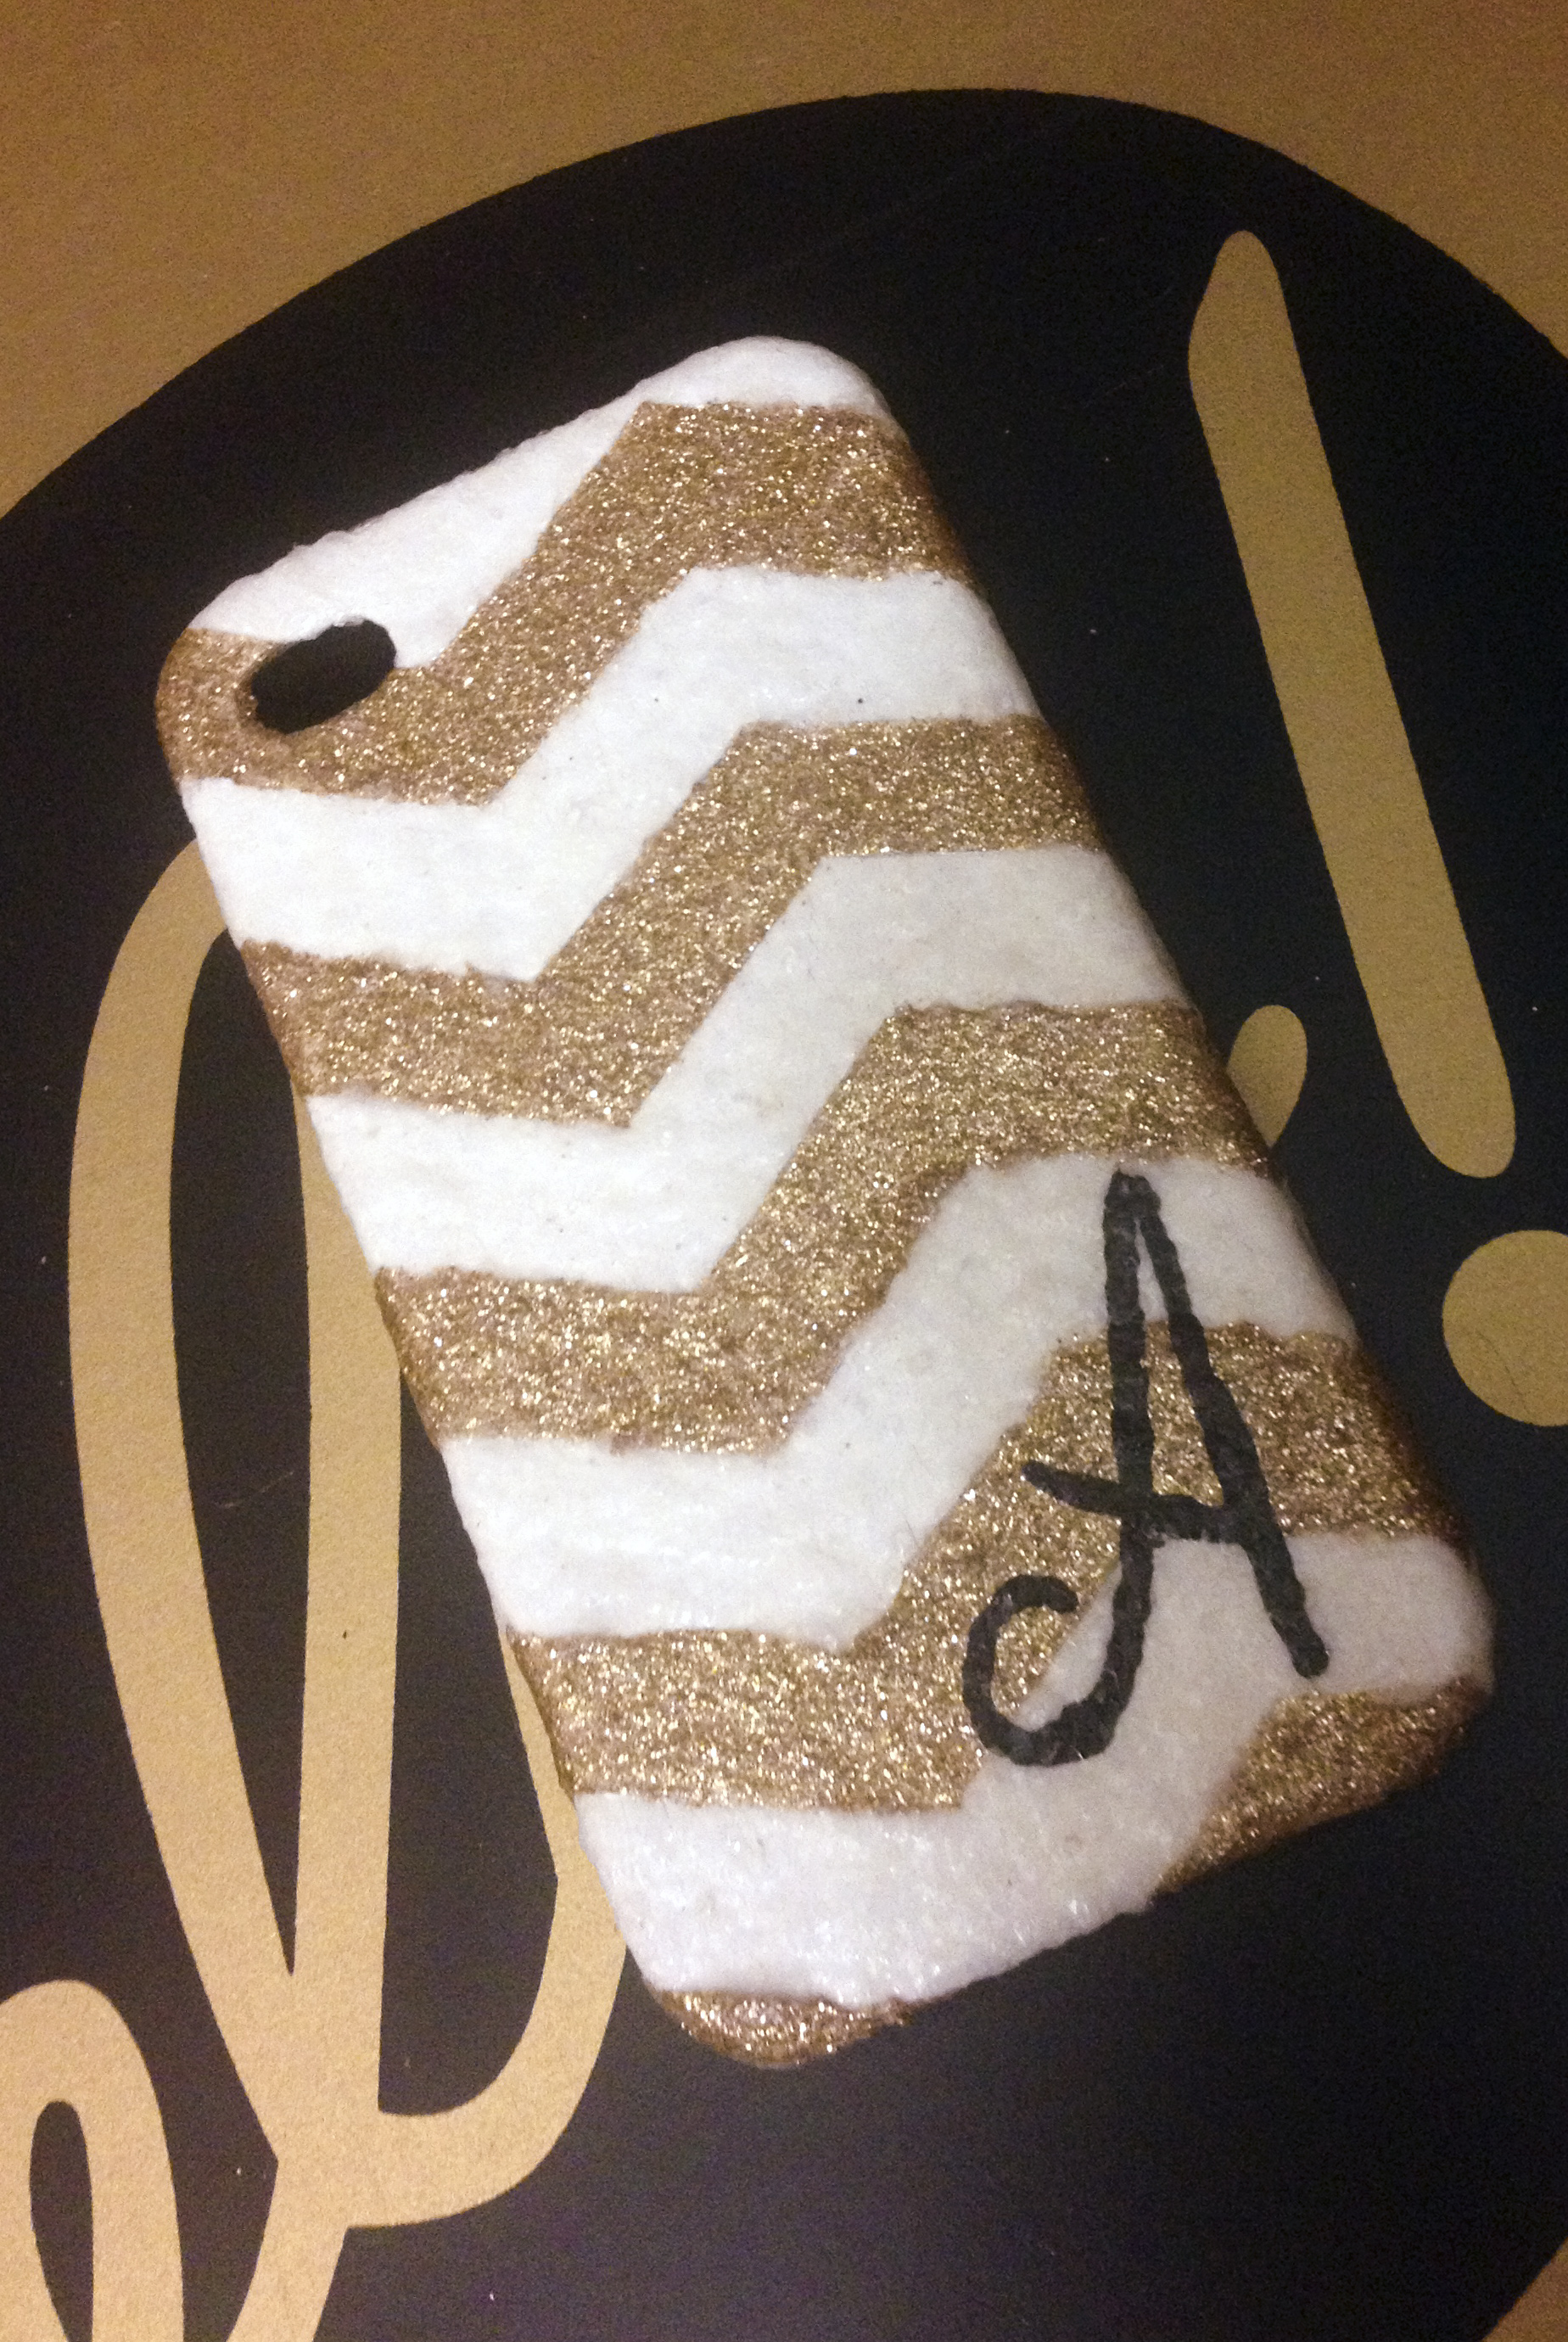
So I did it!
And I like it better than the one in the store. Super win!
Read on to see how you can make your own!
You will need the following:
- Old unused phone case
- Scissors
- Painter's tape
- Ruler
- An assortment of paint brushes (at least four, one fine point)
- Mod Podge
- Two colors of glitter
- Craft knife
- Paint palette
- Hair dryer
- Black acrylic paint
First, cut the painter's tape into a bunch of little strips making sure they are all the same length. The longer the strips, the longer each zig and zag will be.
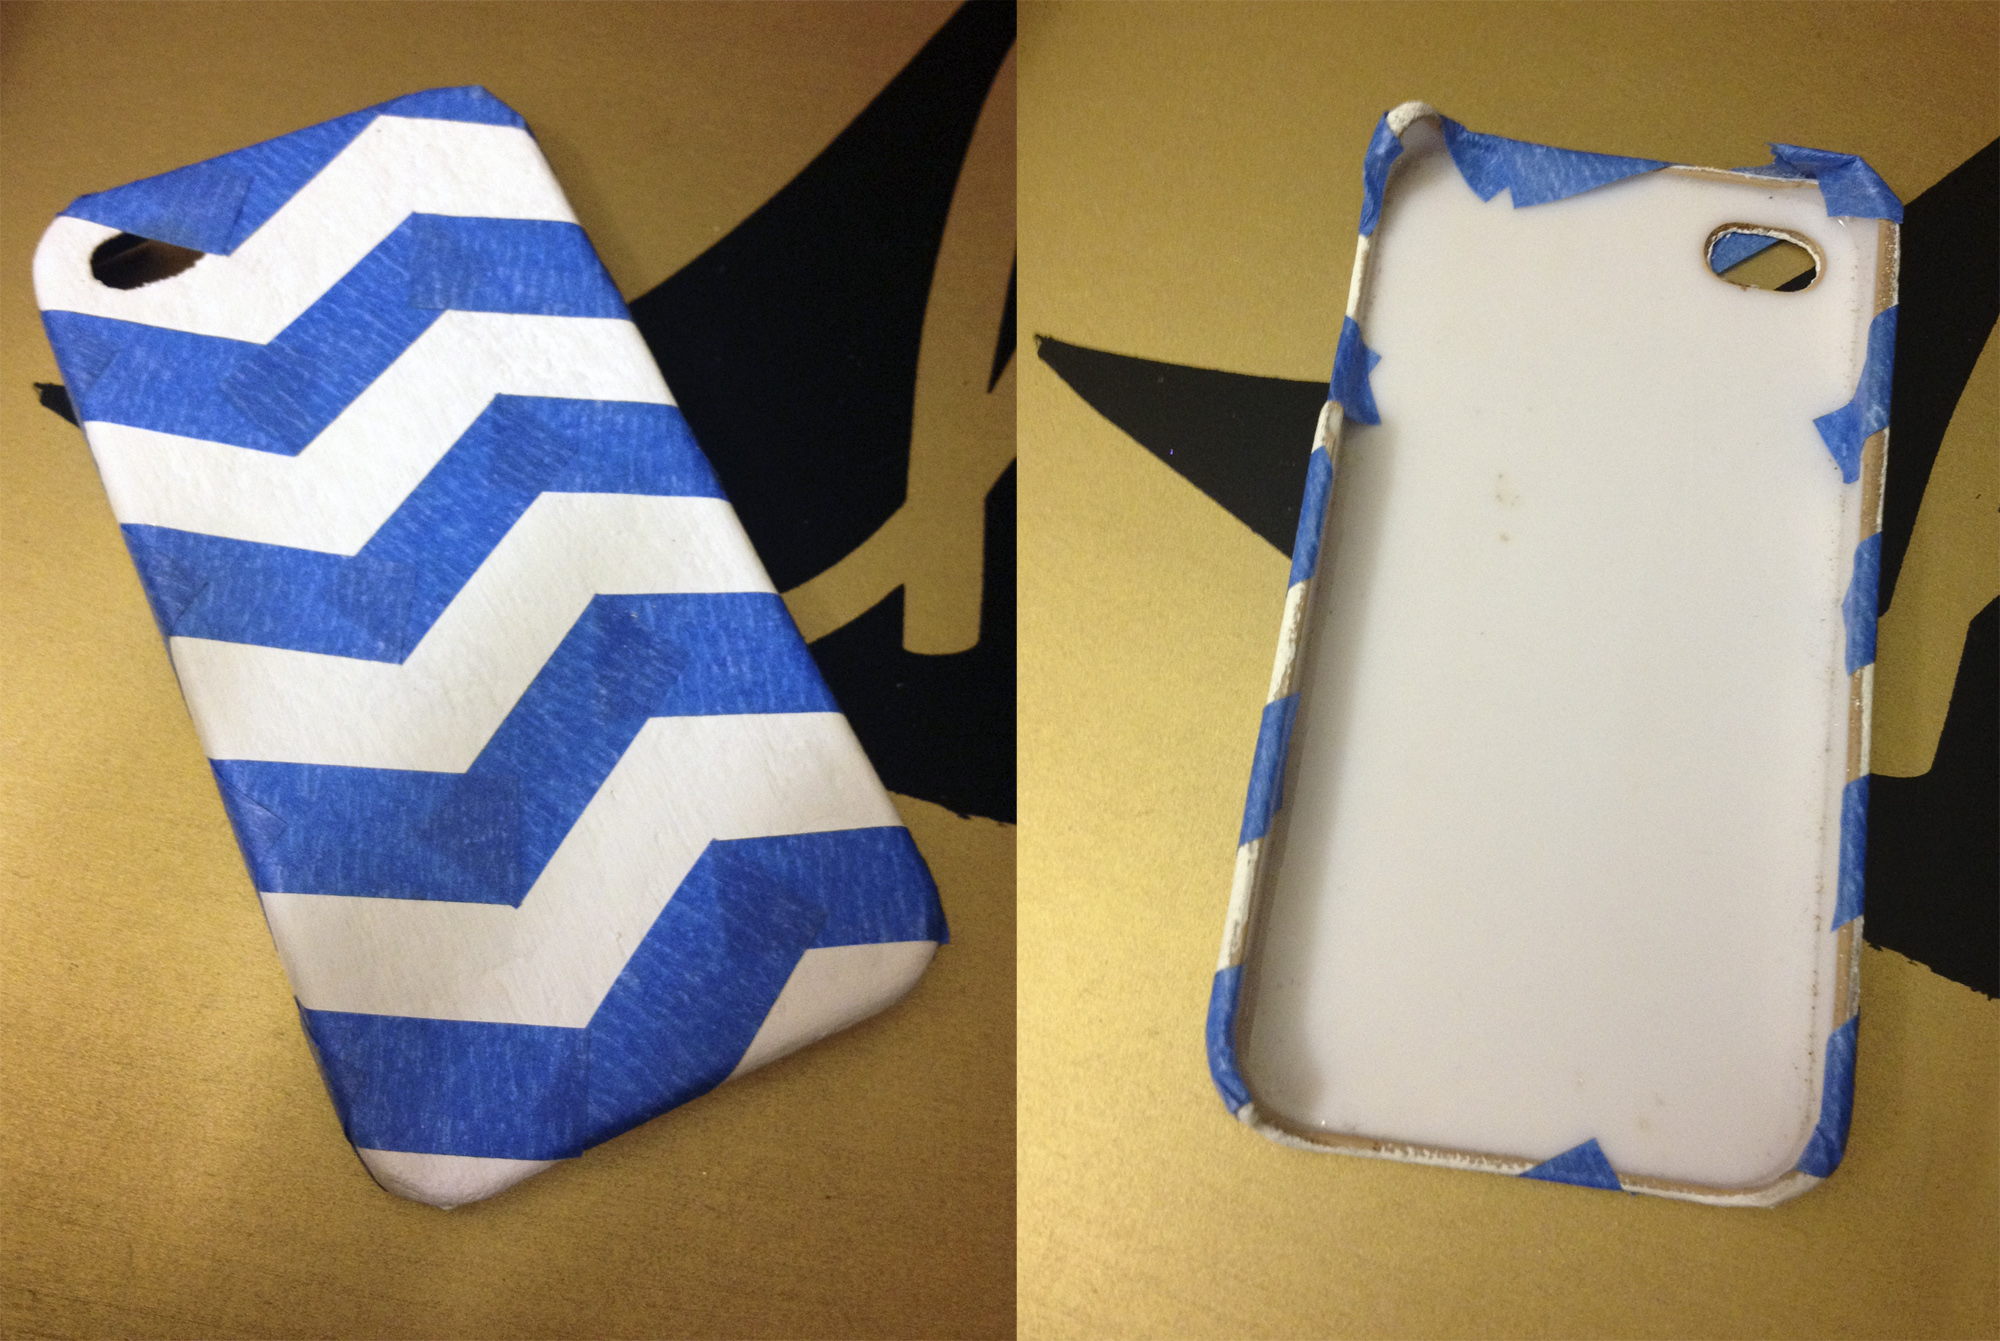
Use the pieces of tape to mark off a chevron pattern across the case. Wrap the tape all the way around to the under side of the case; you'll want to be able to lift these edges later on.
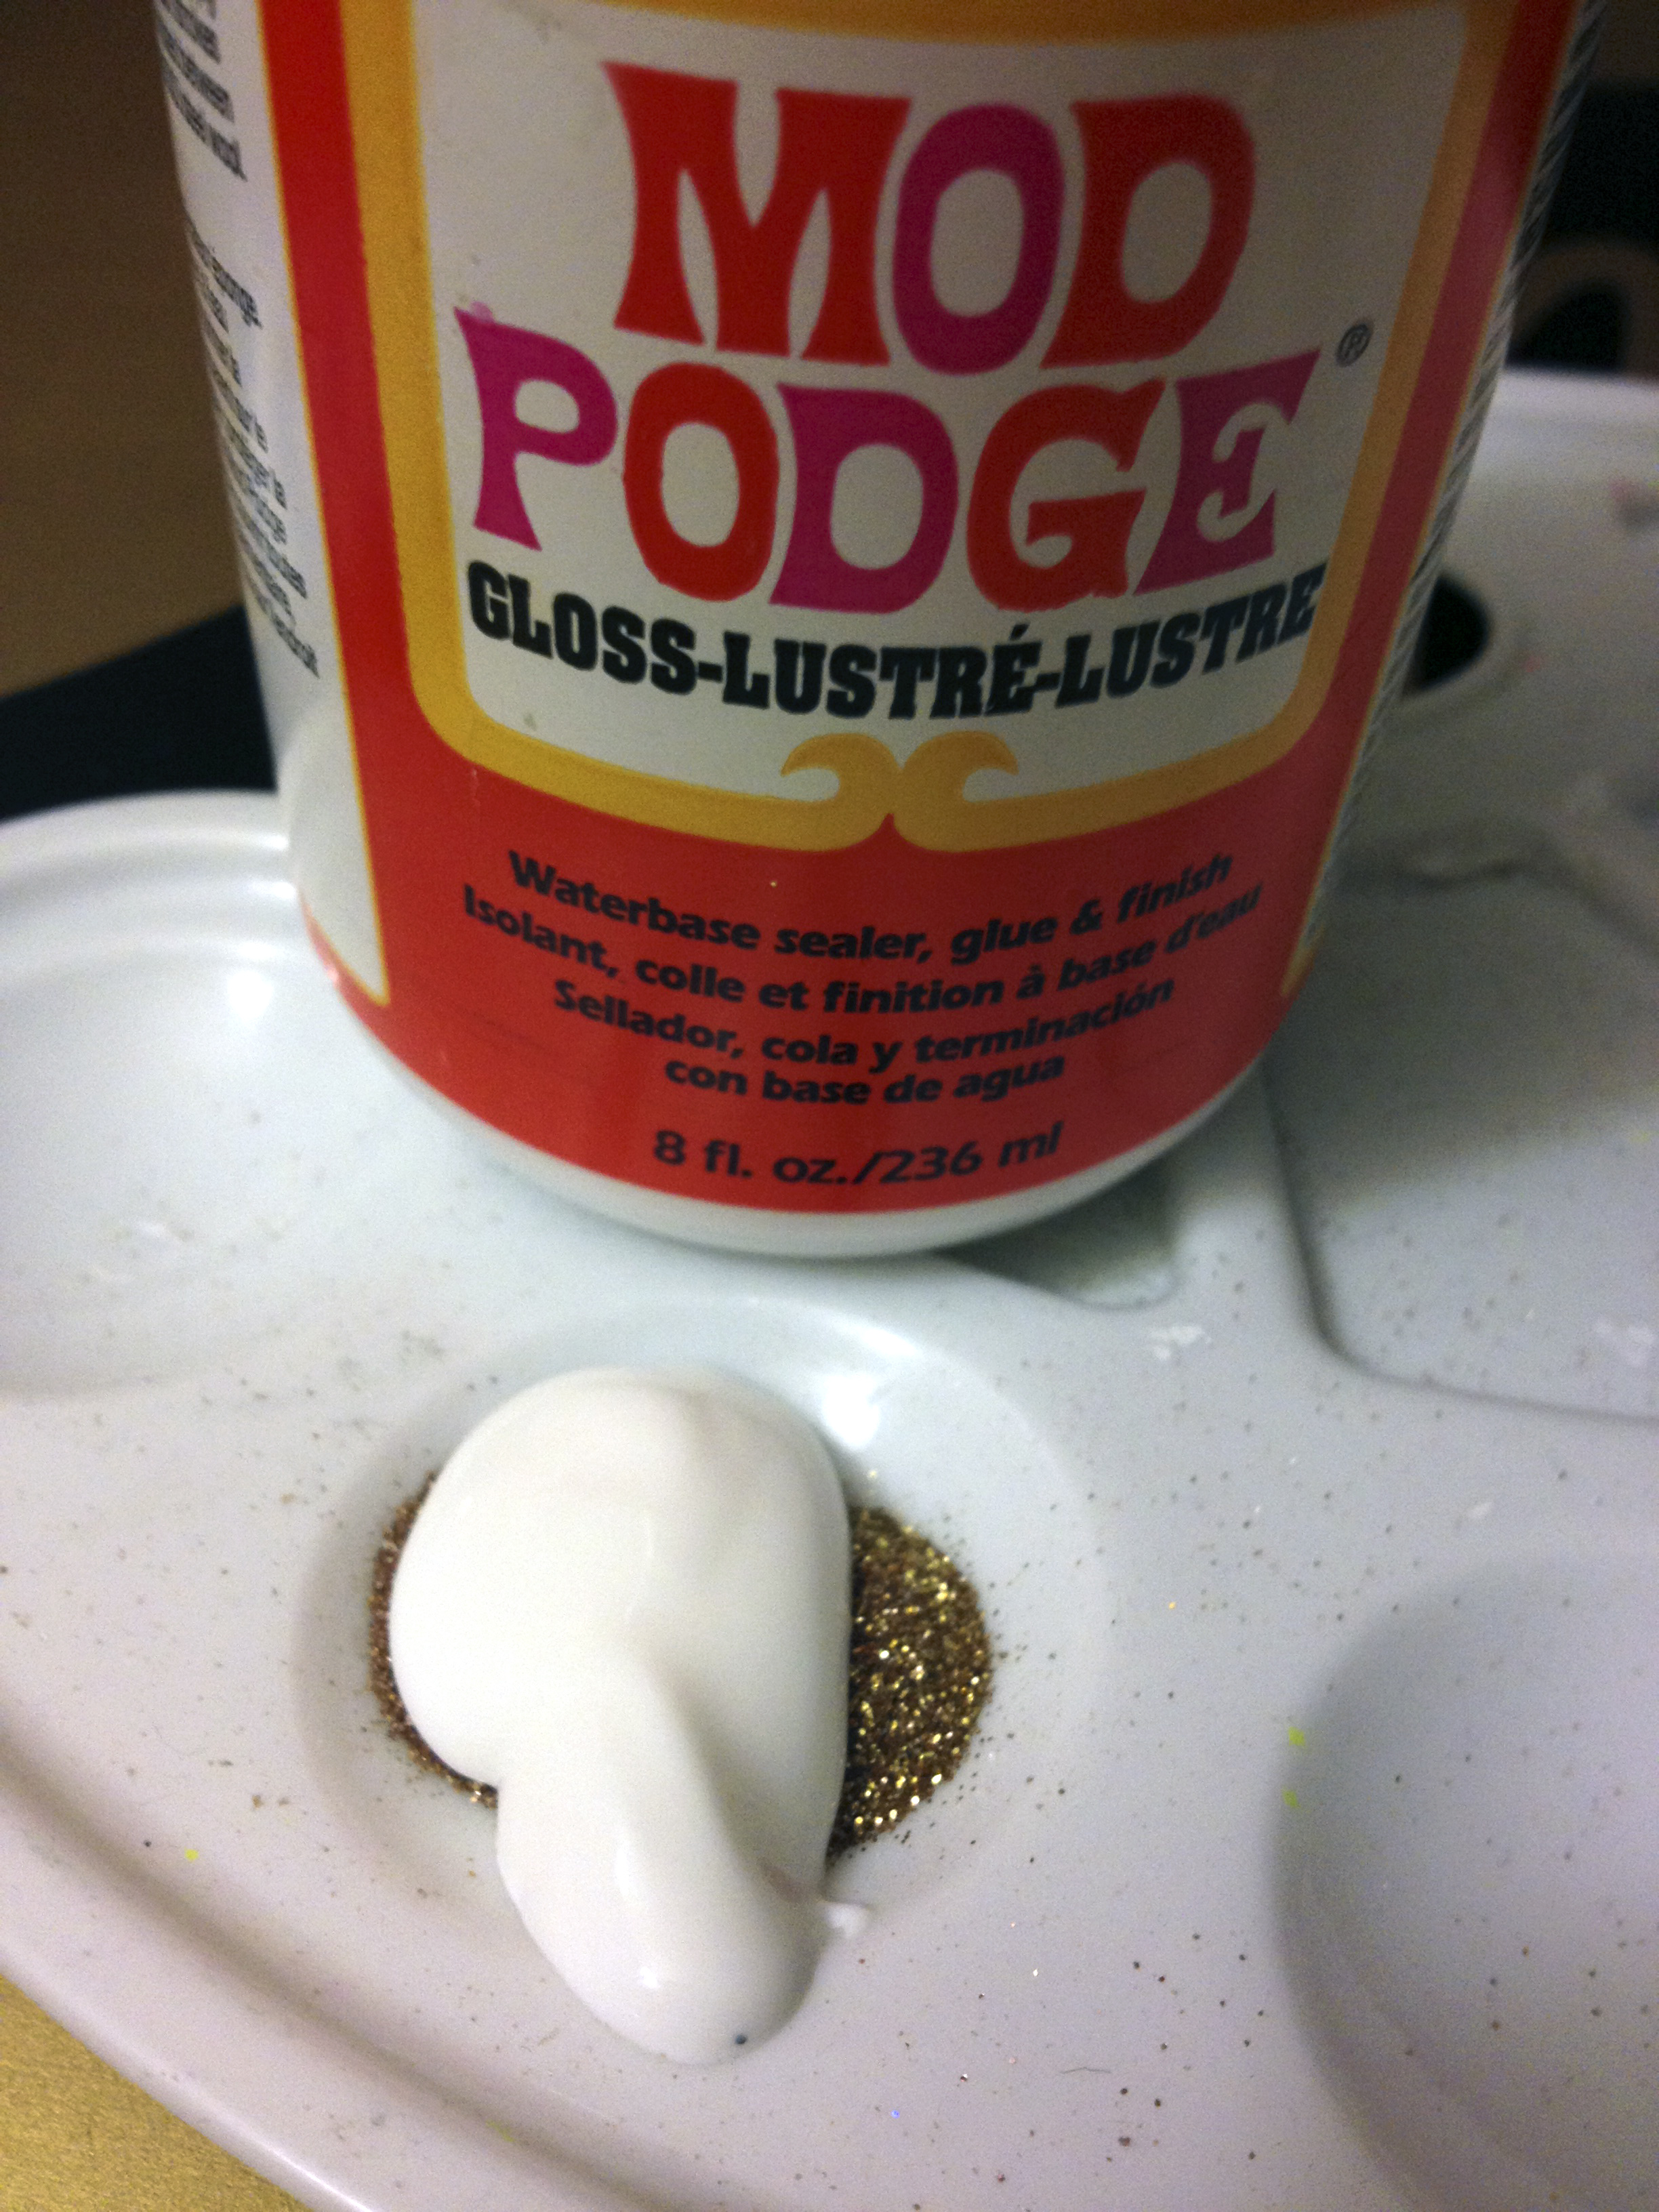
With your first color of glitter, mix one part glitter with one part Mod Podge on your palette.
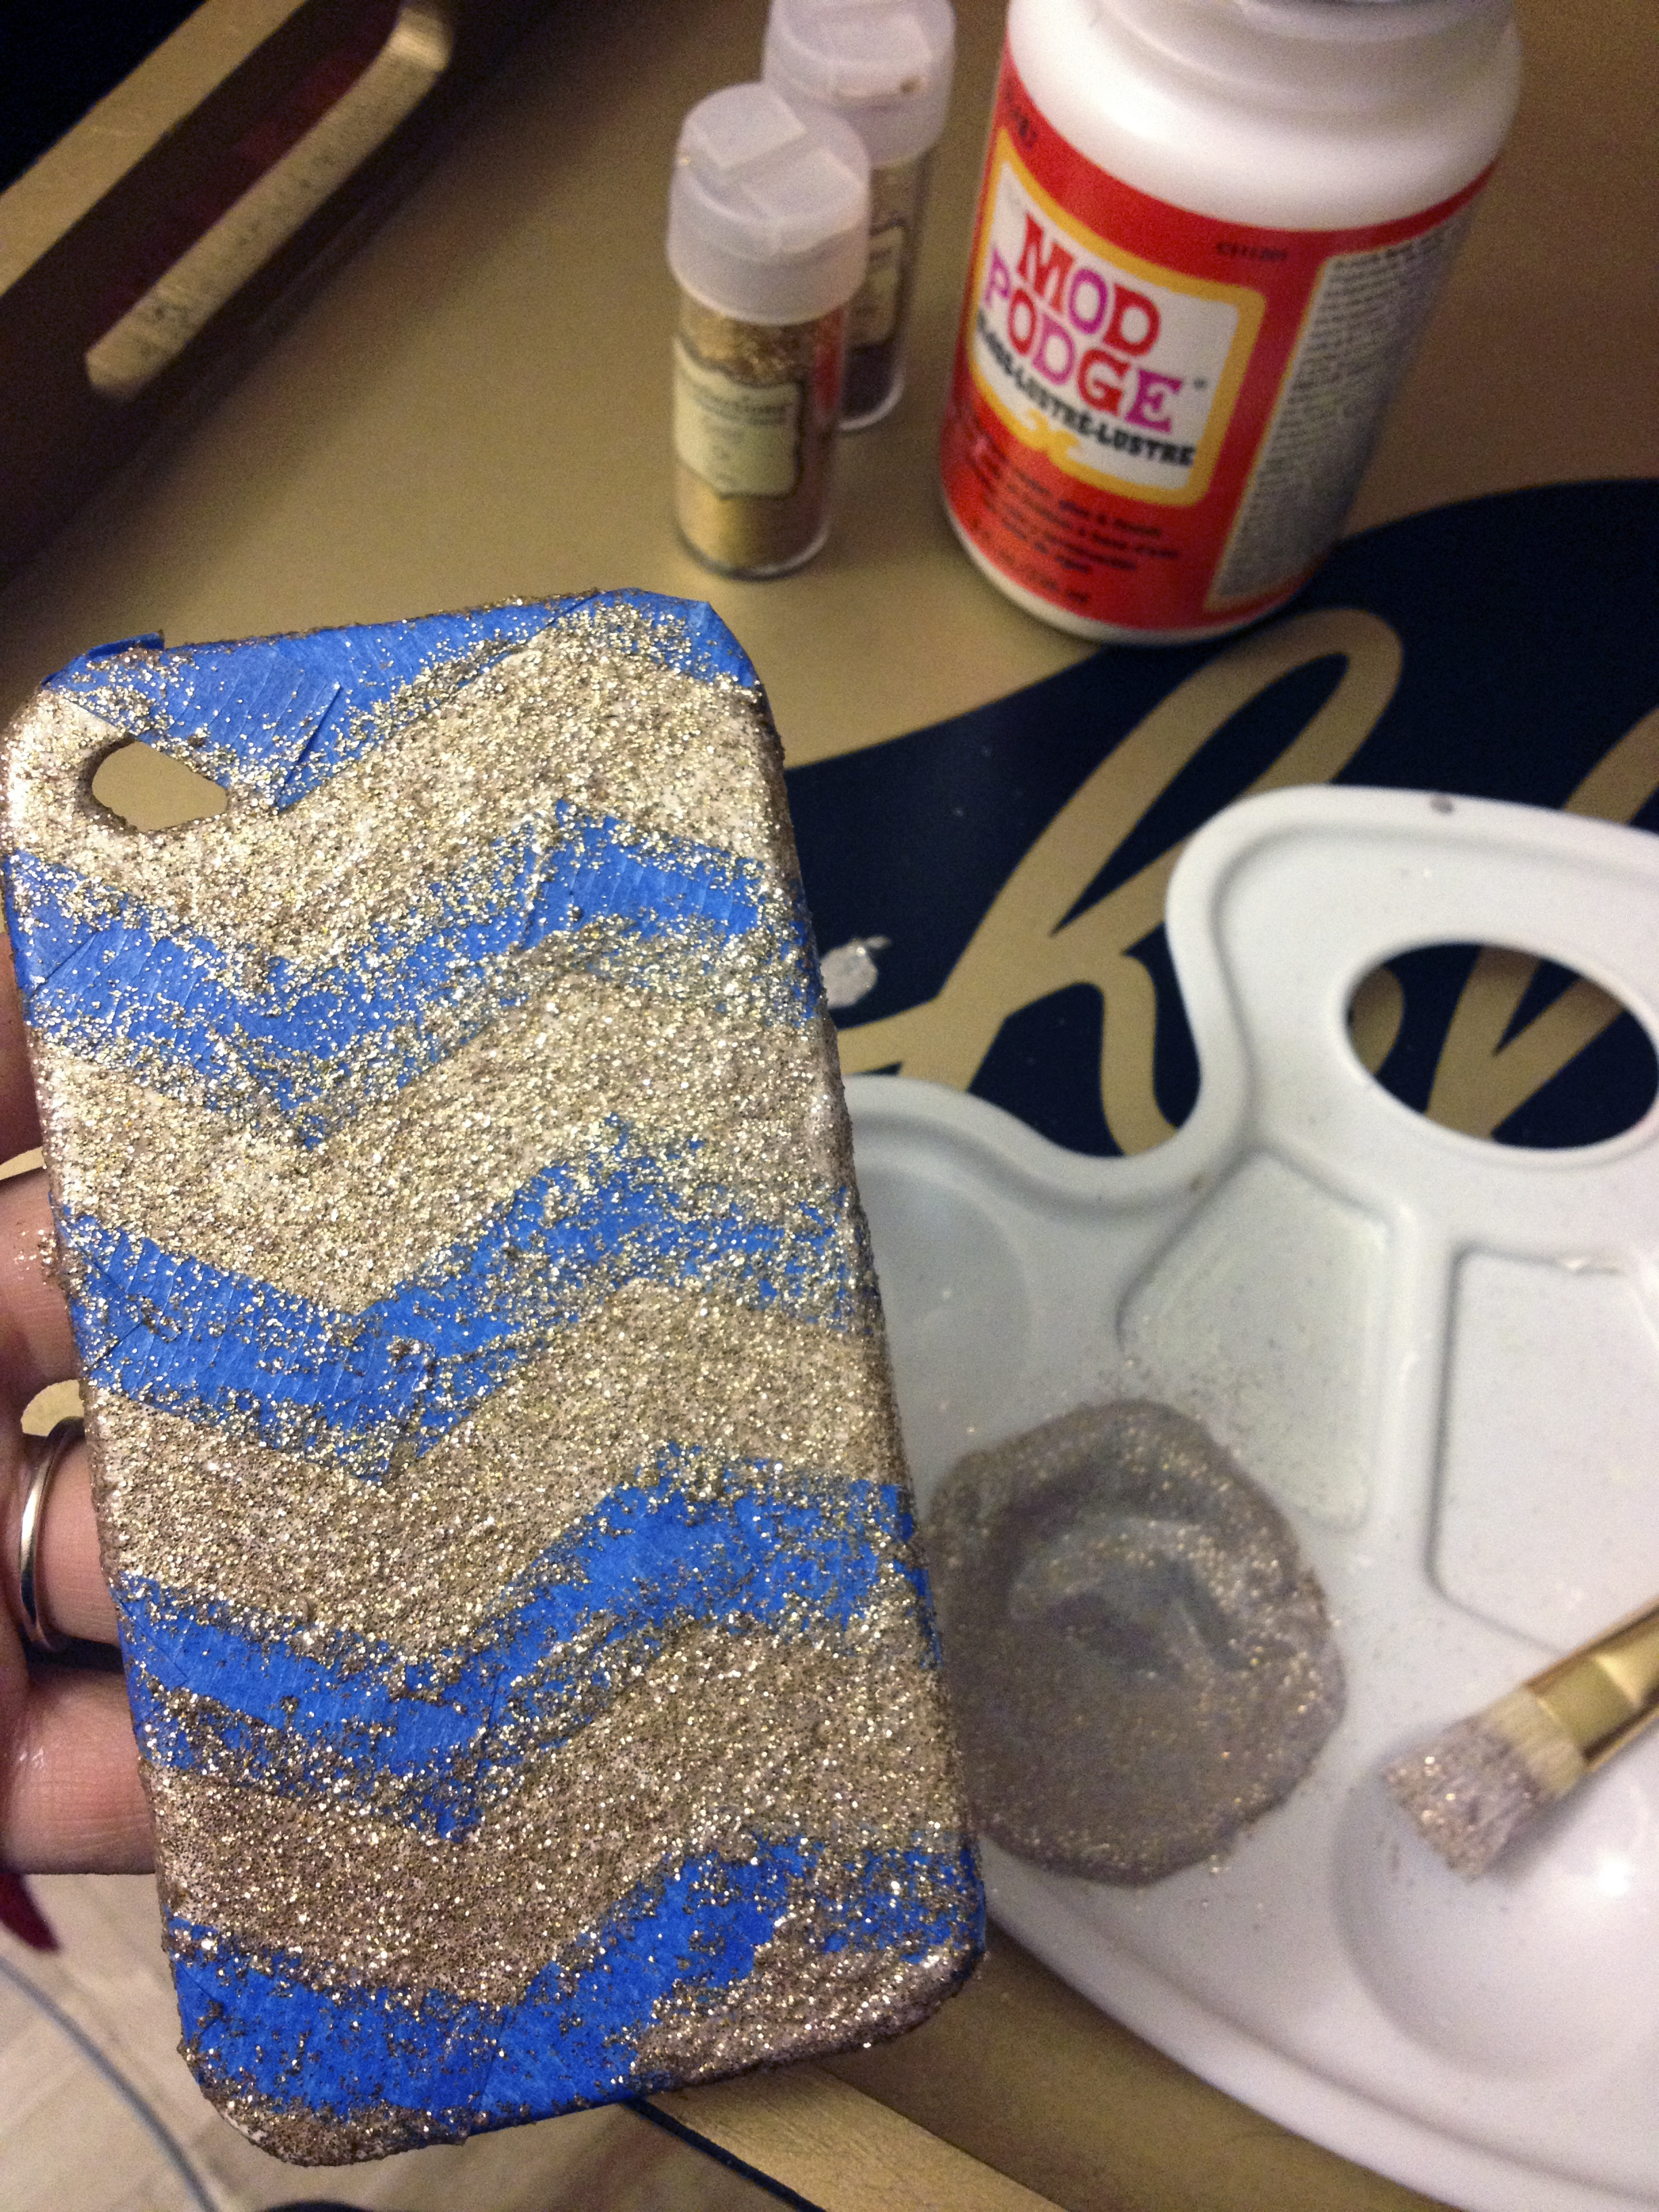
Use your paint brush to swipe on a thin layer of gold glitter mixture and allow to fully dry. Speed up the drying process by using a hair dryer. Repeat layer after layer until the you've reached the desired look. Remember, it's important to let each individual layer to fully dry otherwise you'll end up with the wet Mod Podge trapped under the outer layer.
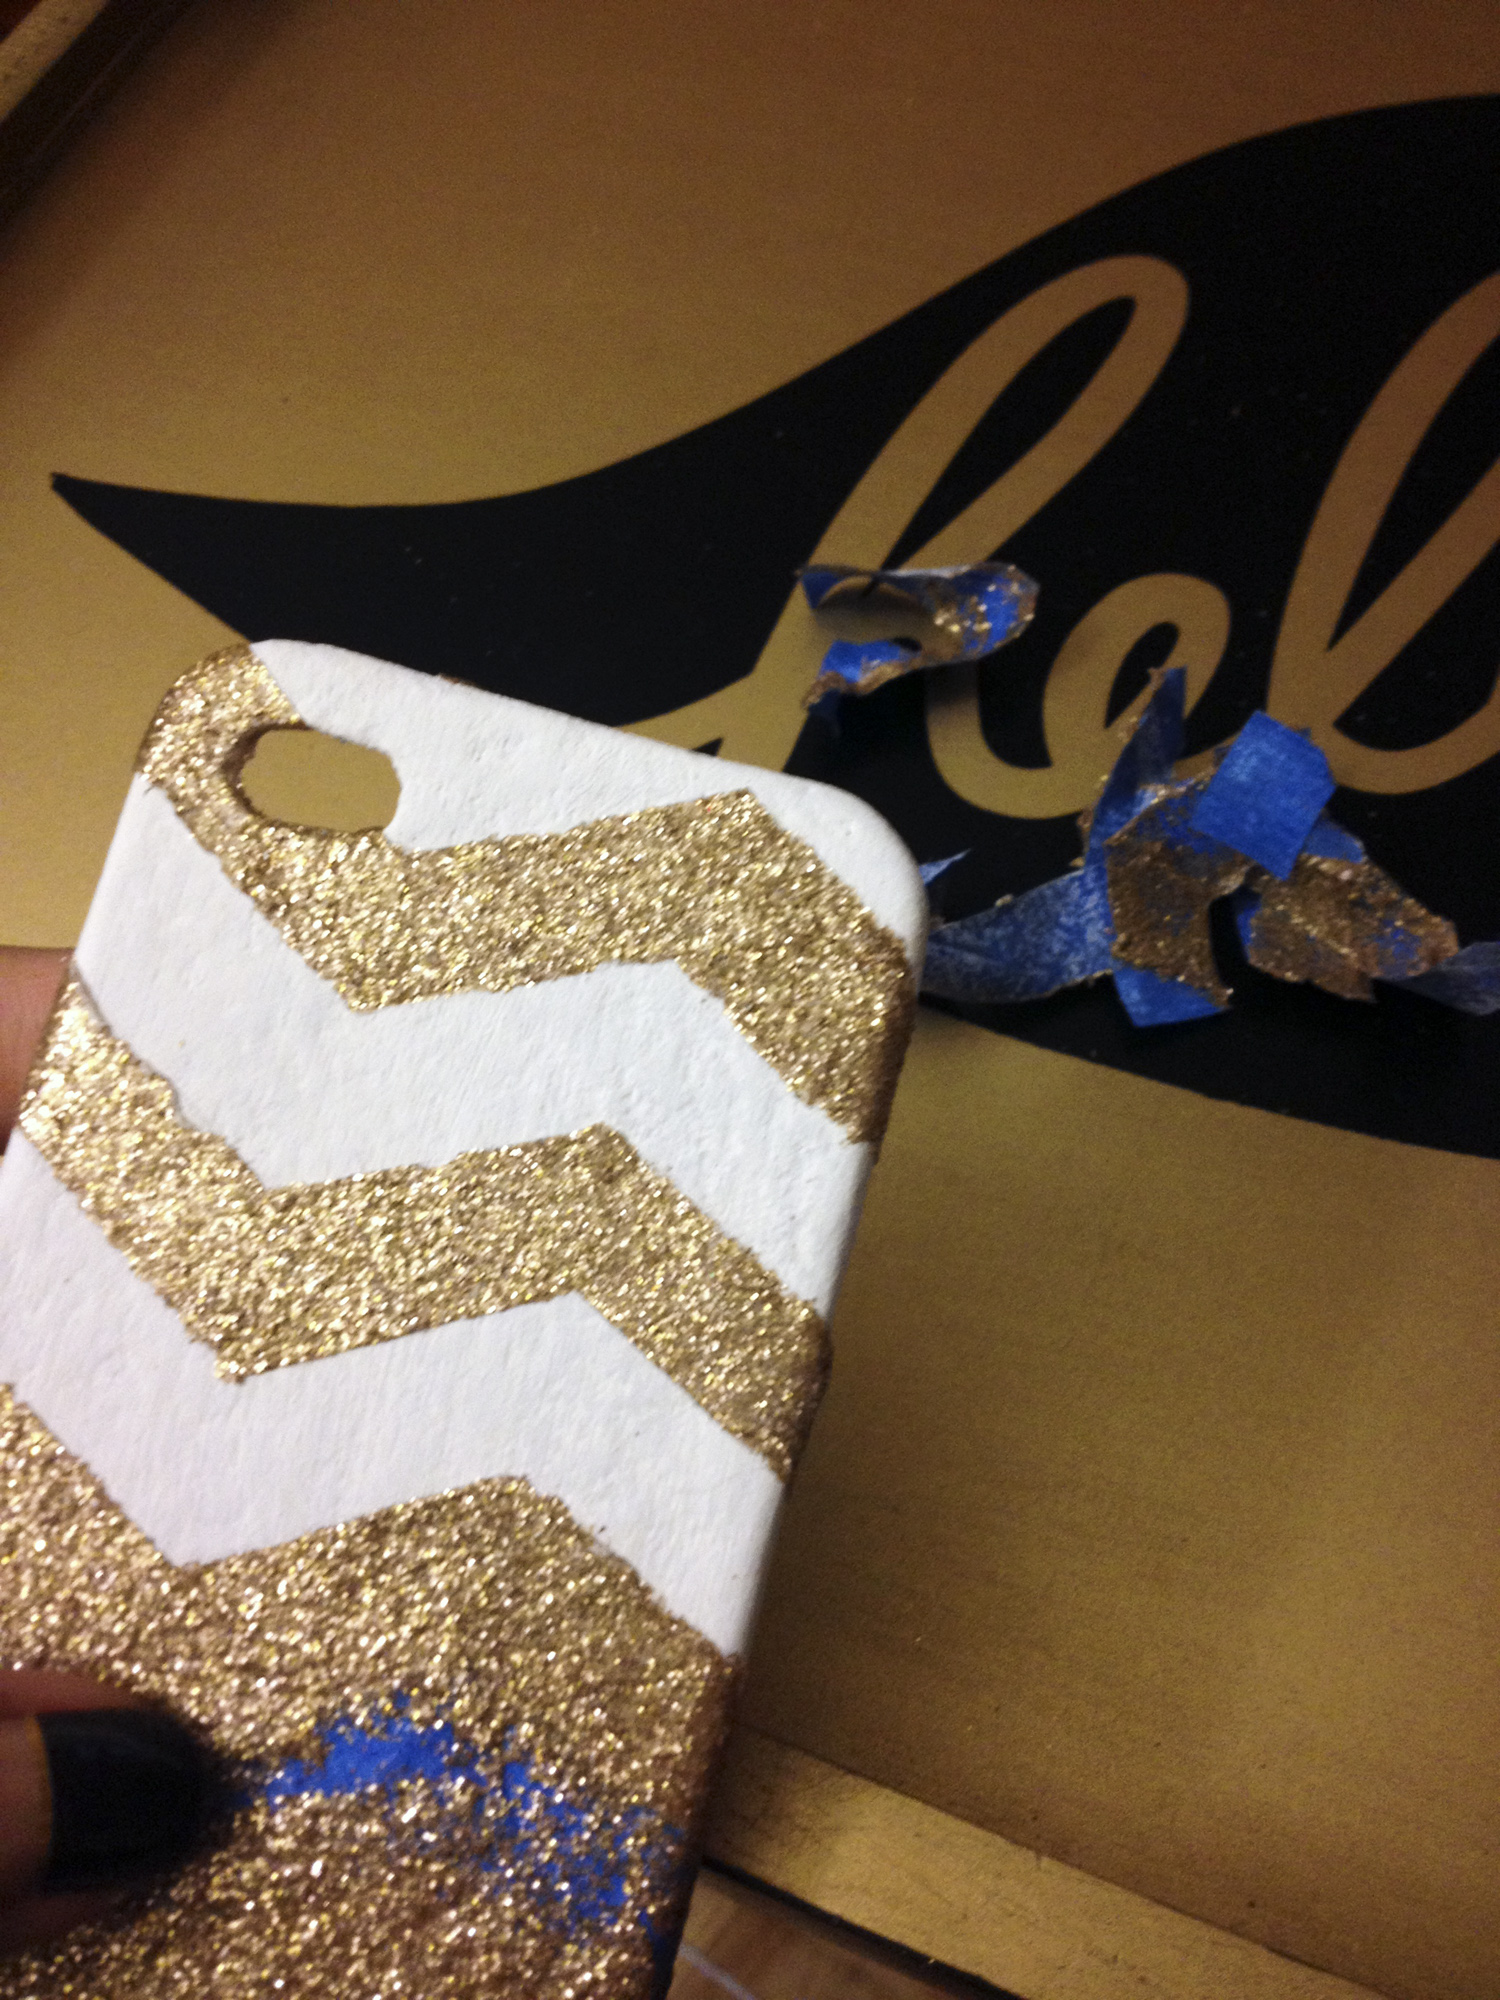
Once dry, carefully peel the tape off by lifting the edges on the inside of the case to reveal the glittery chevron pattern. Use a craft knife to help keep the edges sharp when the Mod Podge is trying to be stubborn.
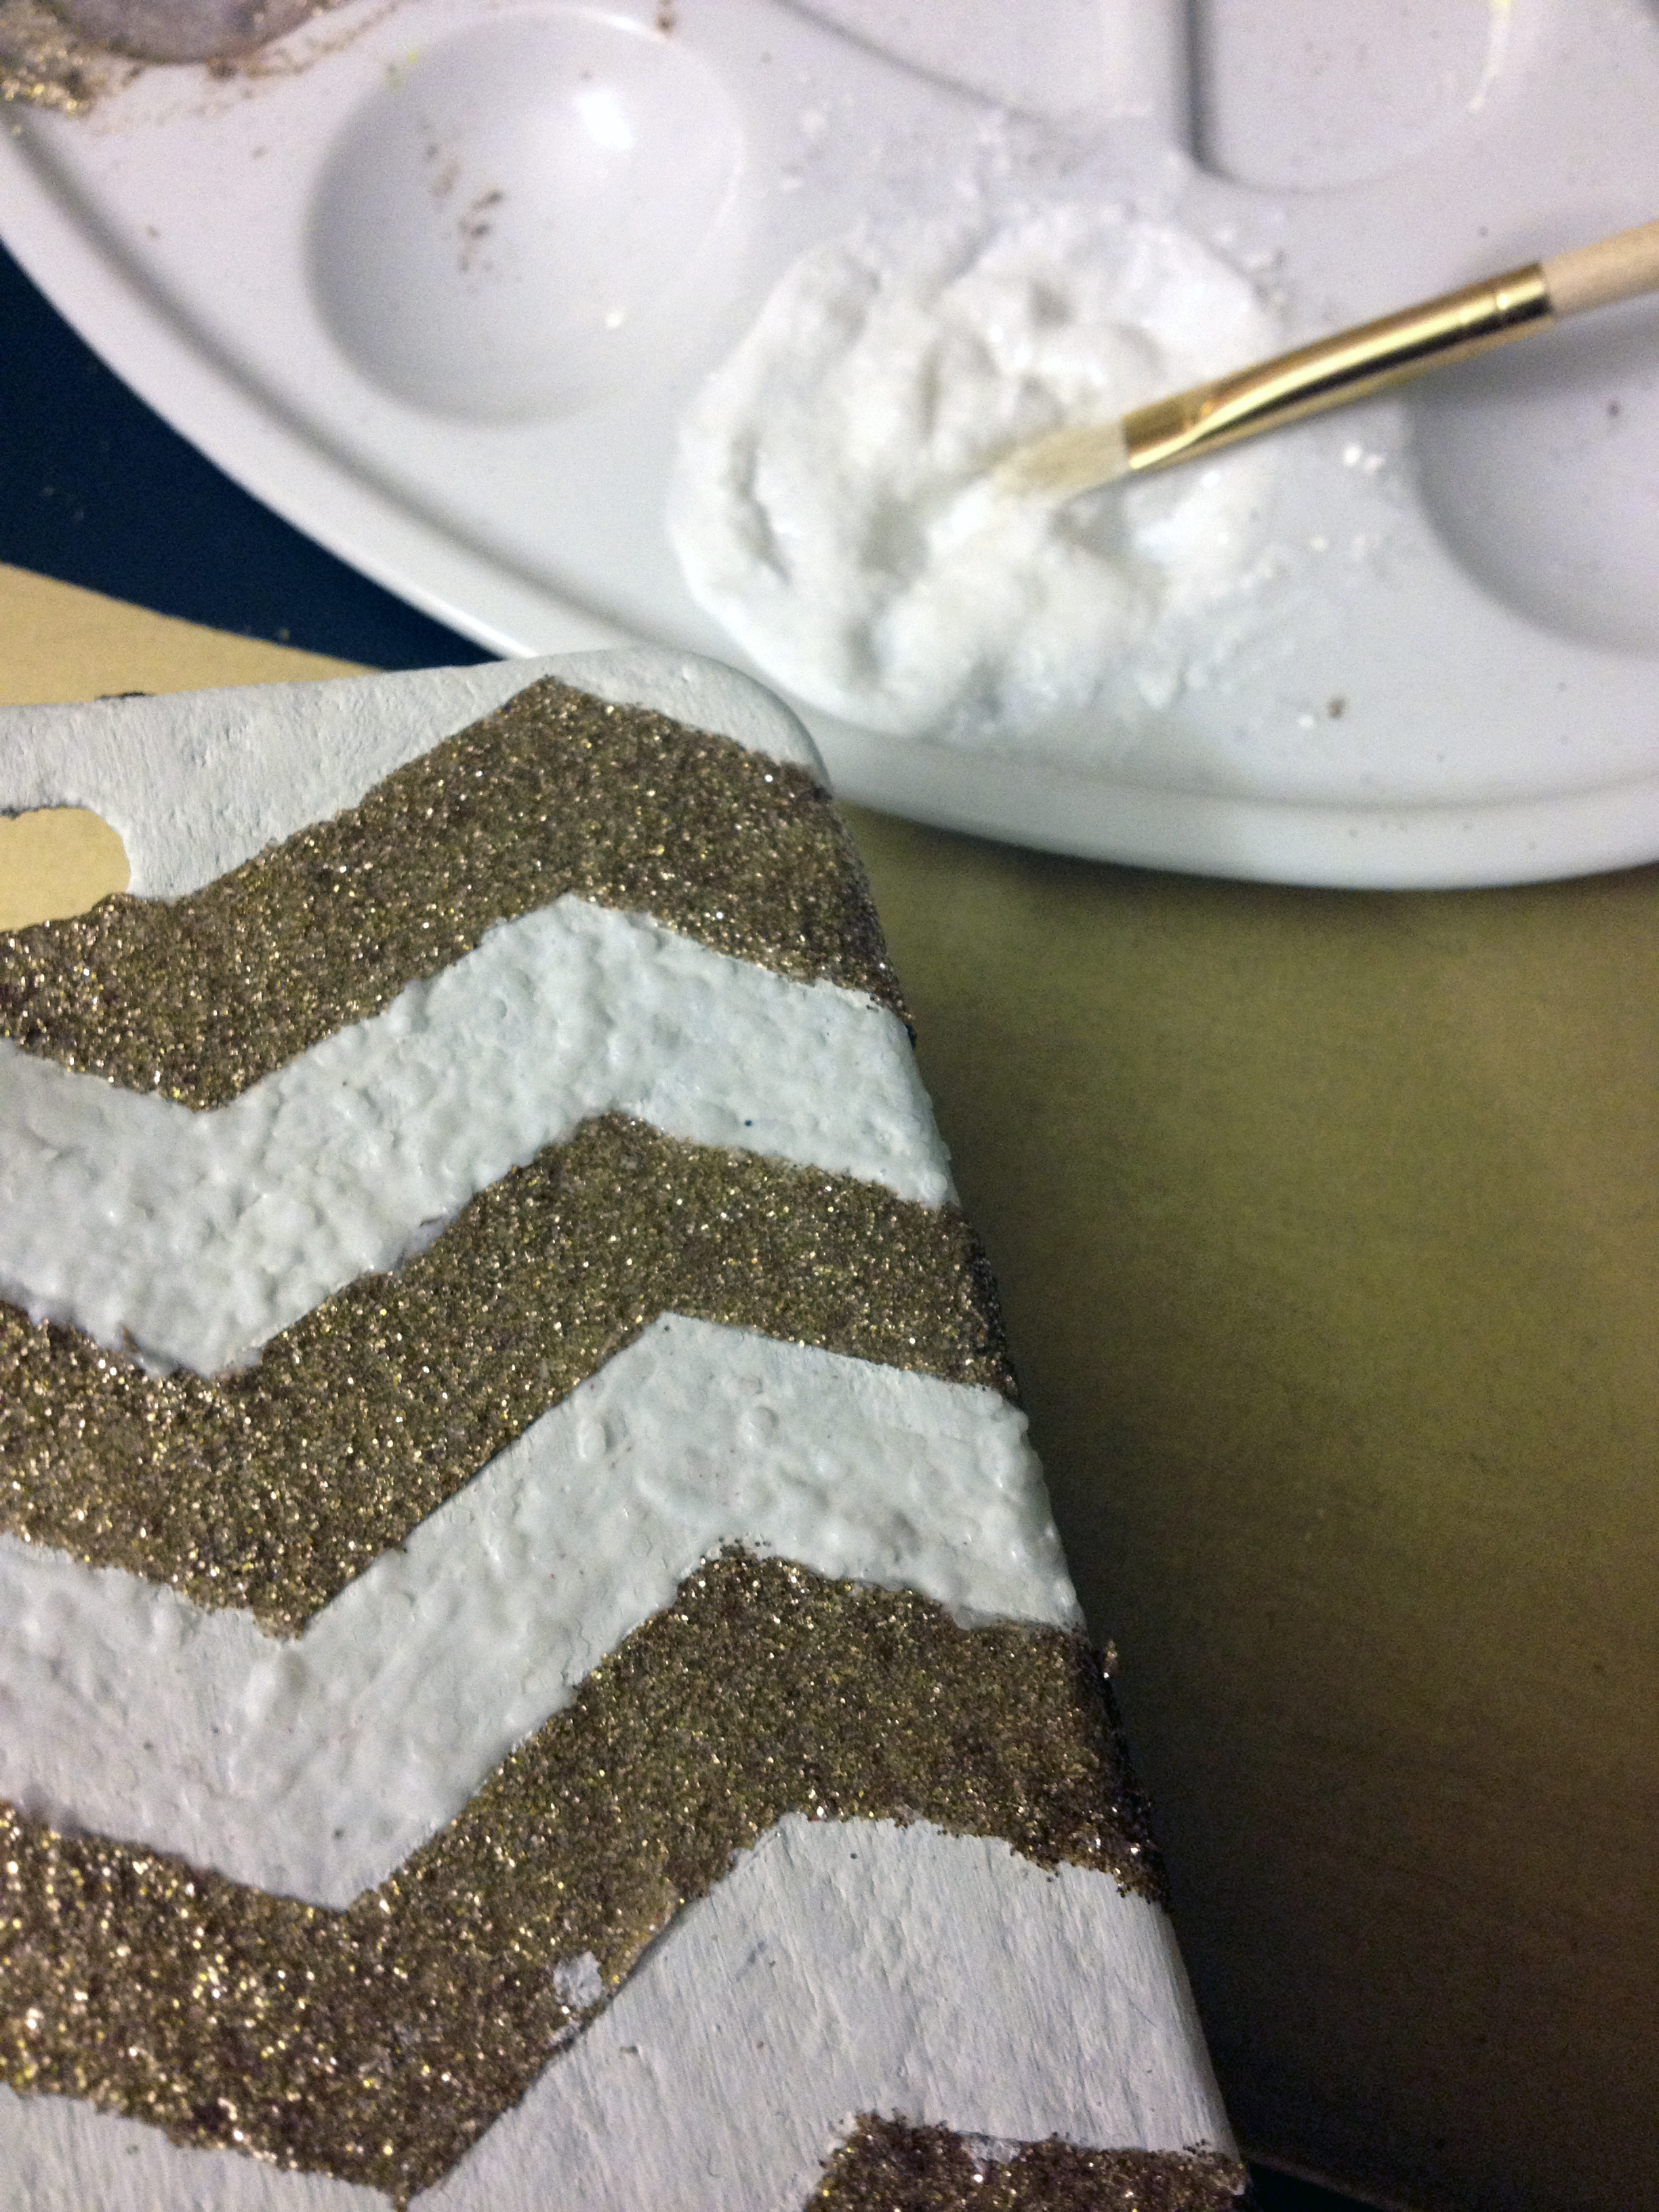
Mix up your second color of glitter into the Mod Podge and use a second paint brush to carefully fill in the empty spaces. Remember, thin layers are the key!
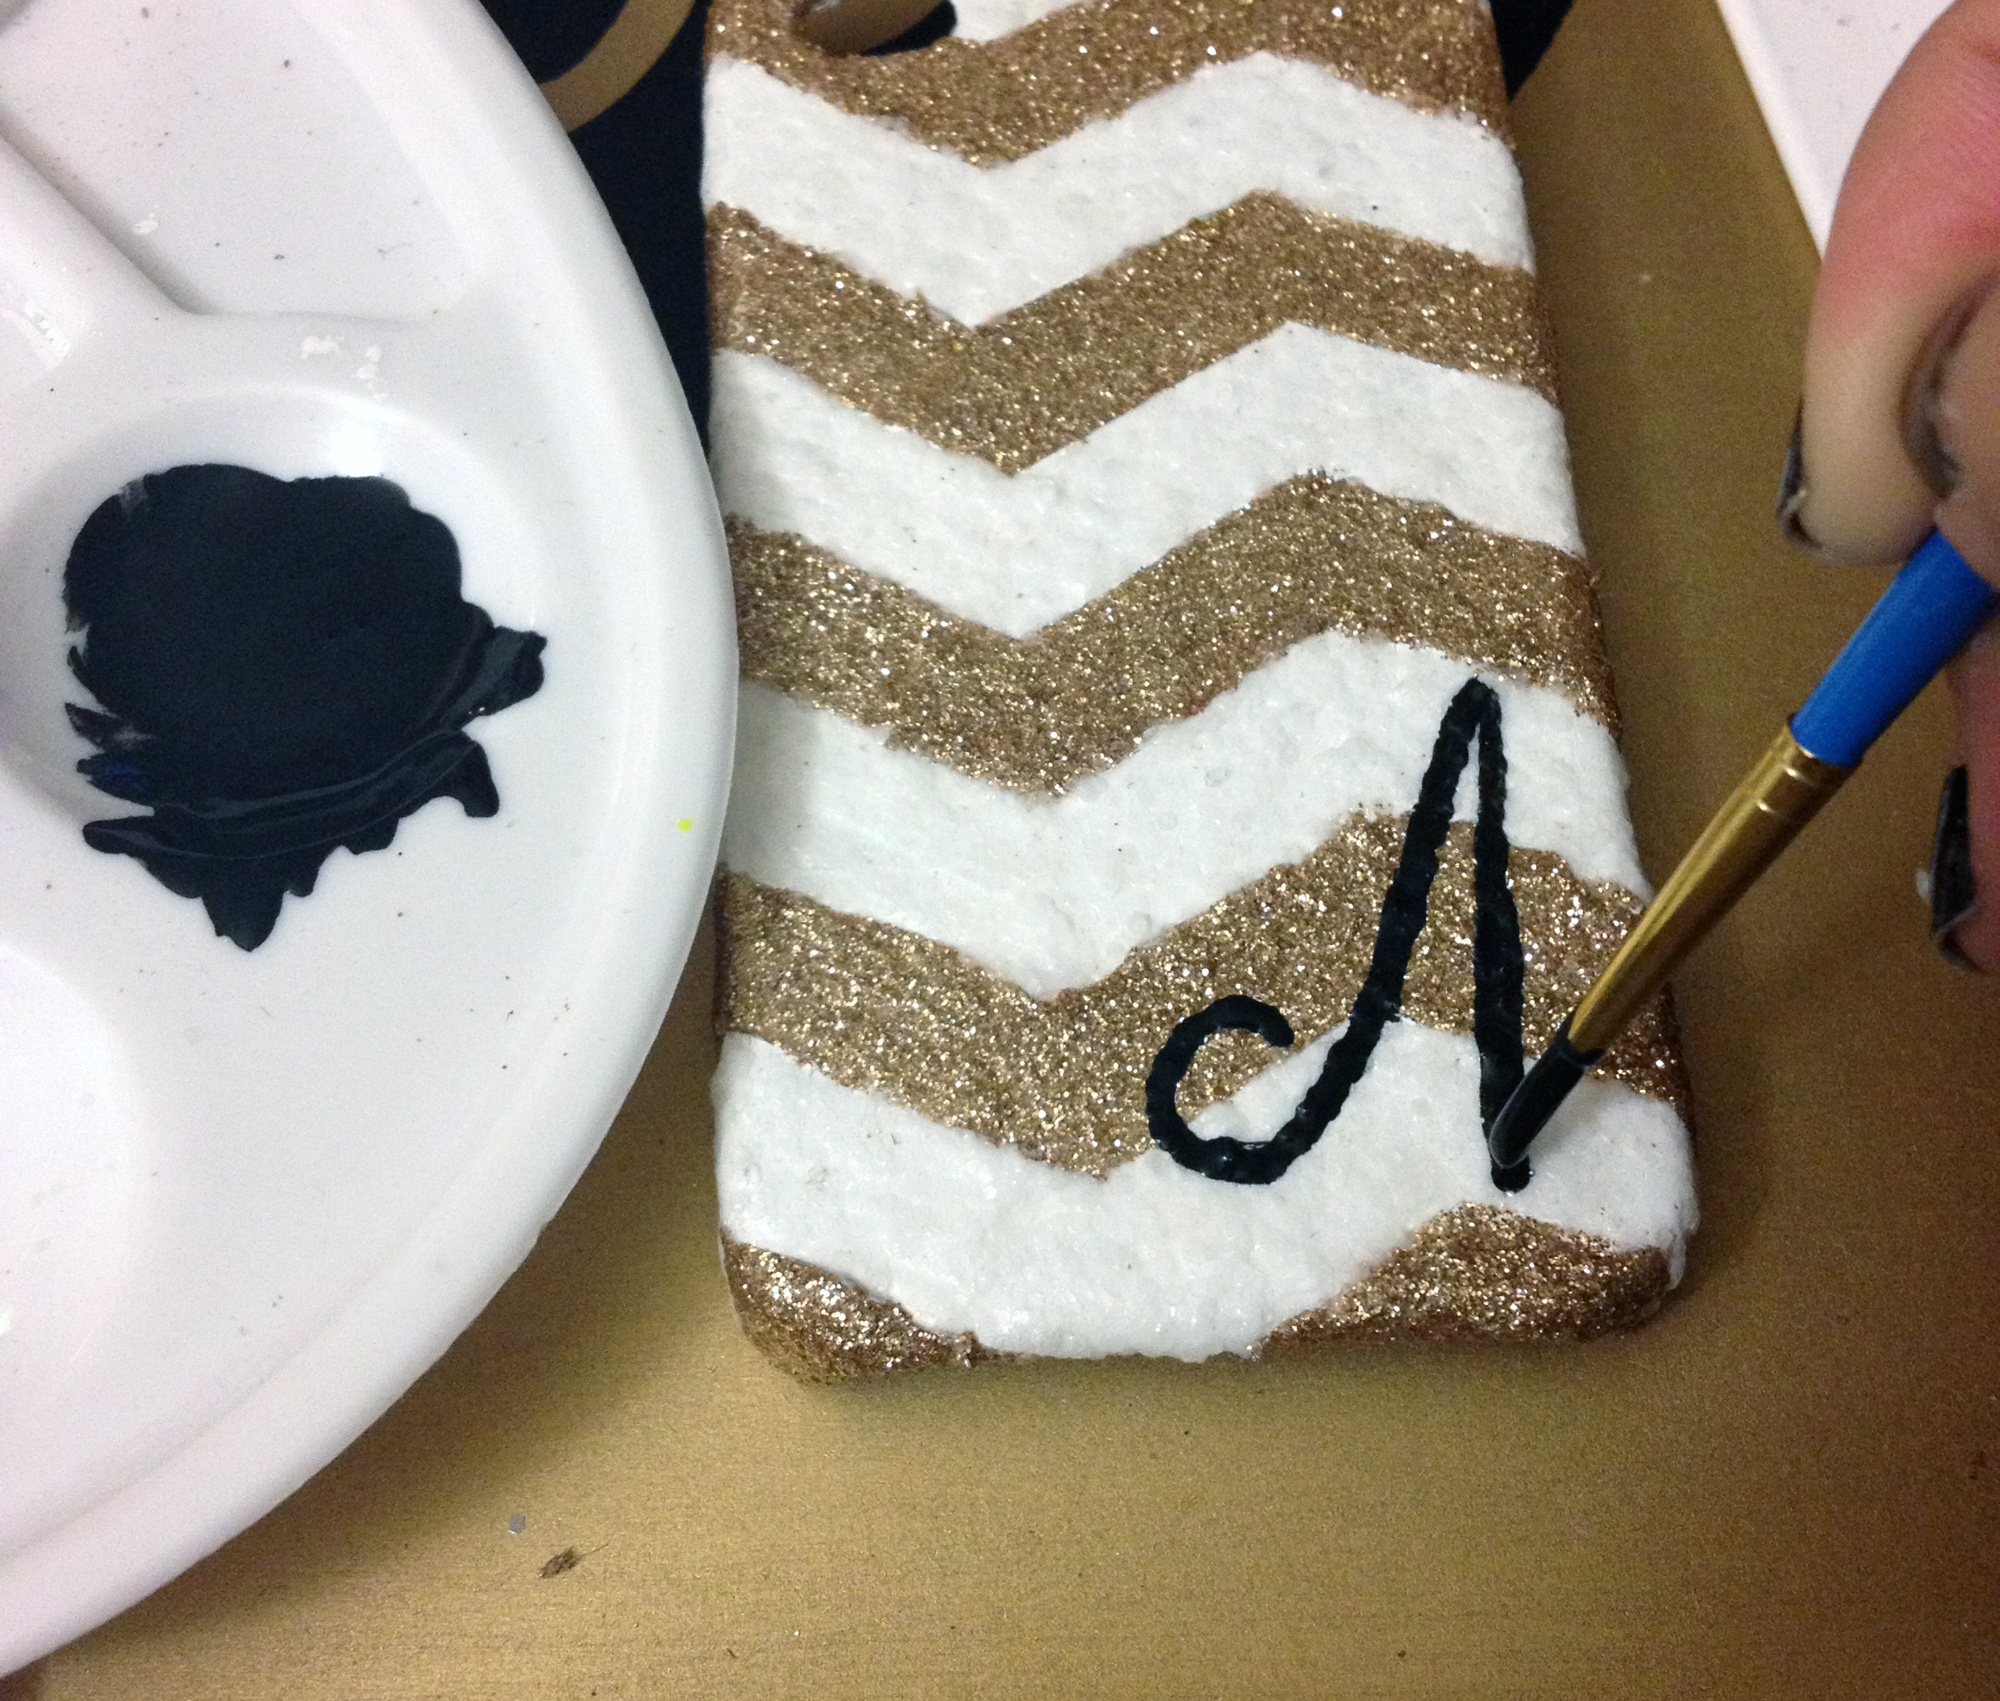
When the glitter layer is completely dry, use a thin paintbrush to freehand your initial onto the case. I recommend practicing the letter on a separate piece of paper until you're comfortable with the motions.
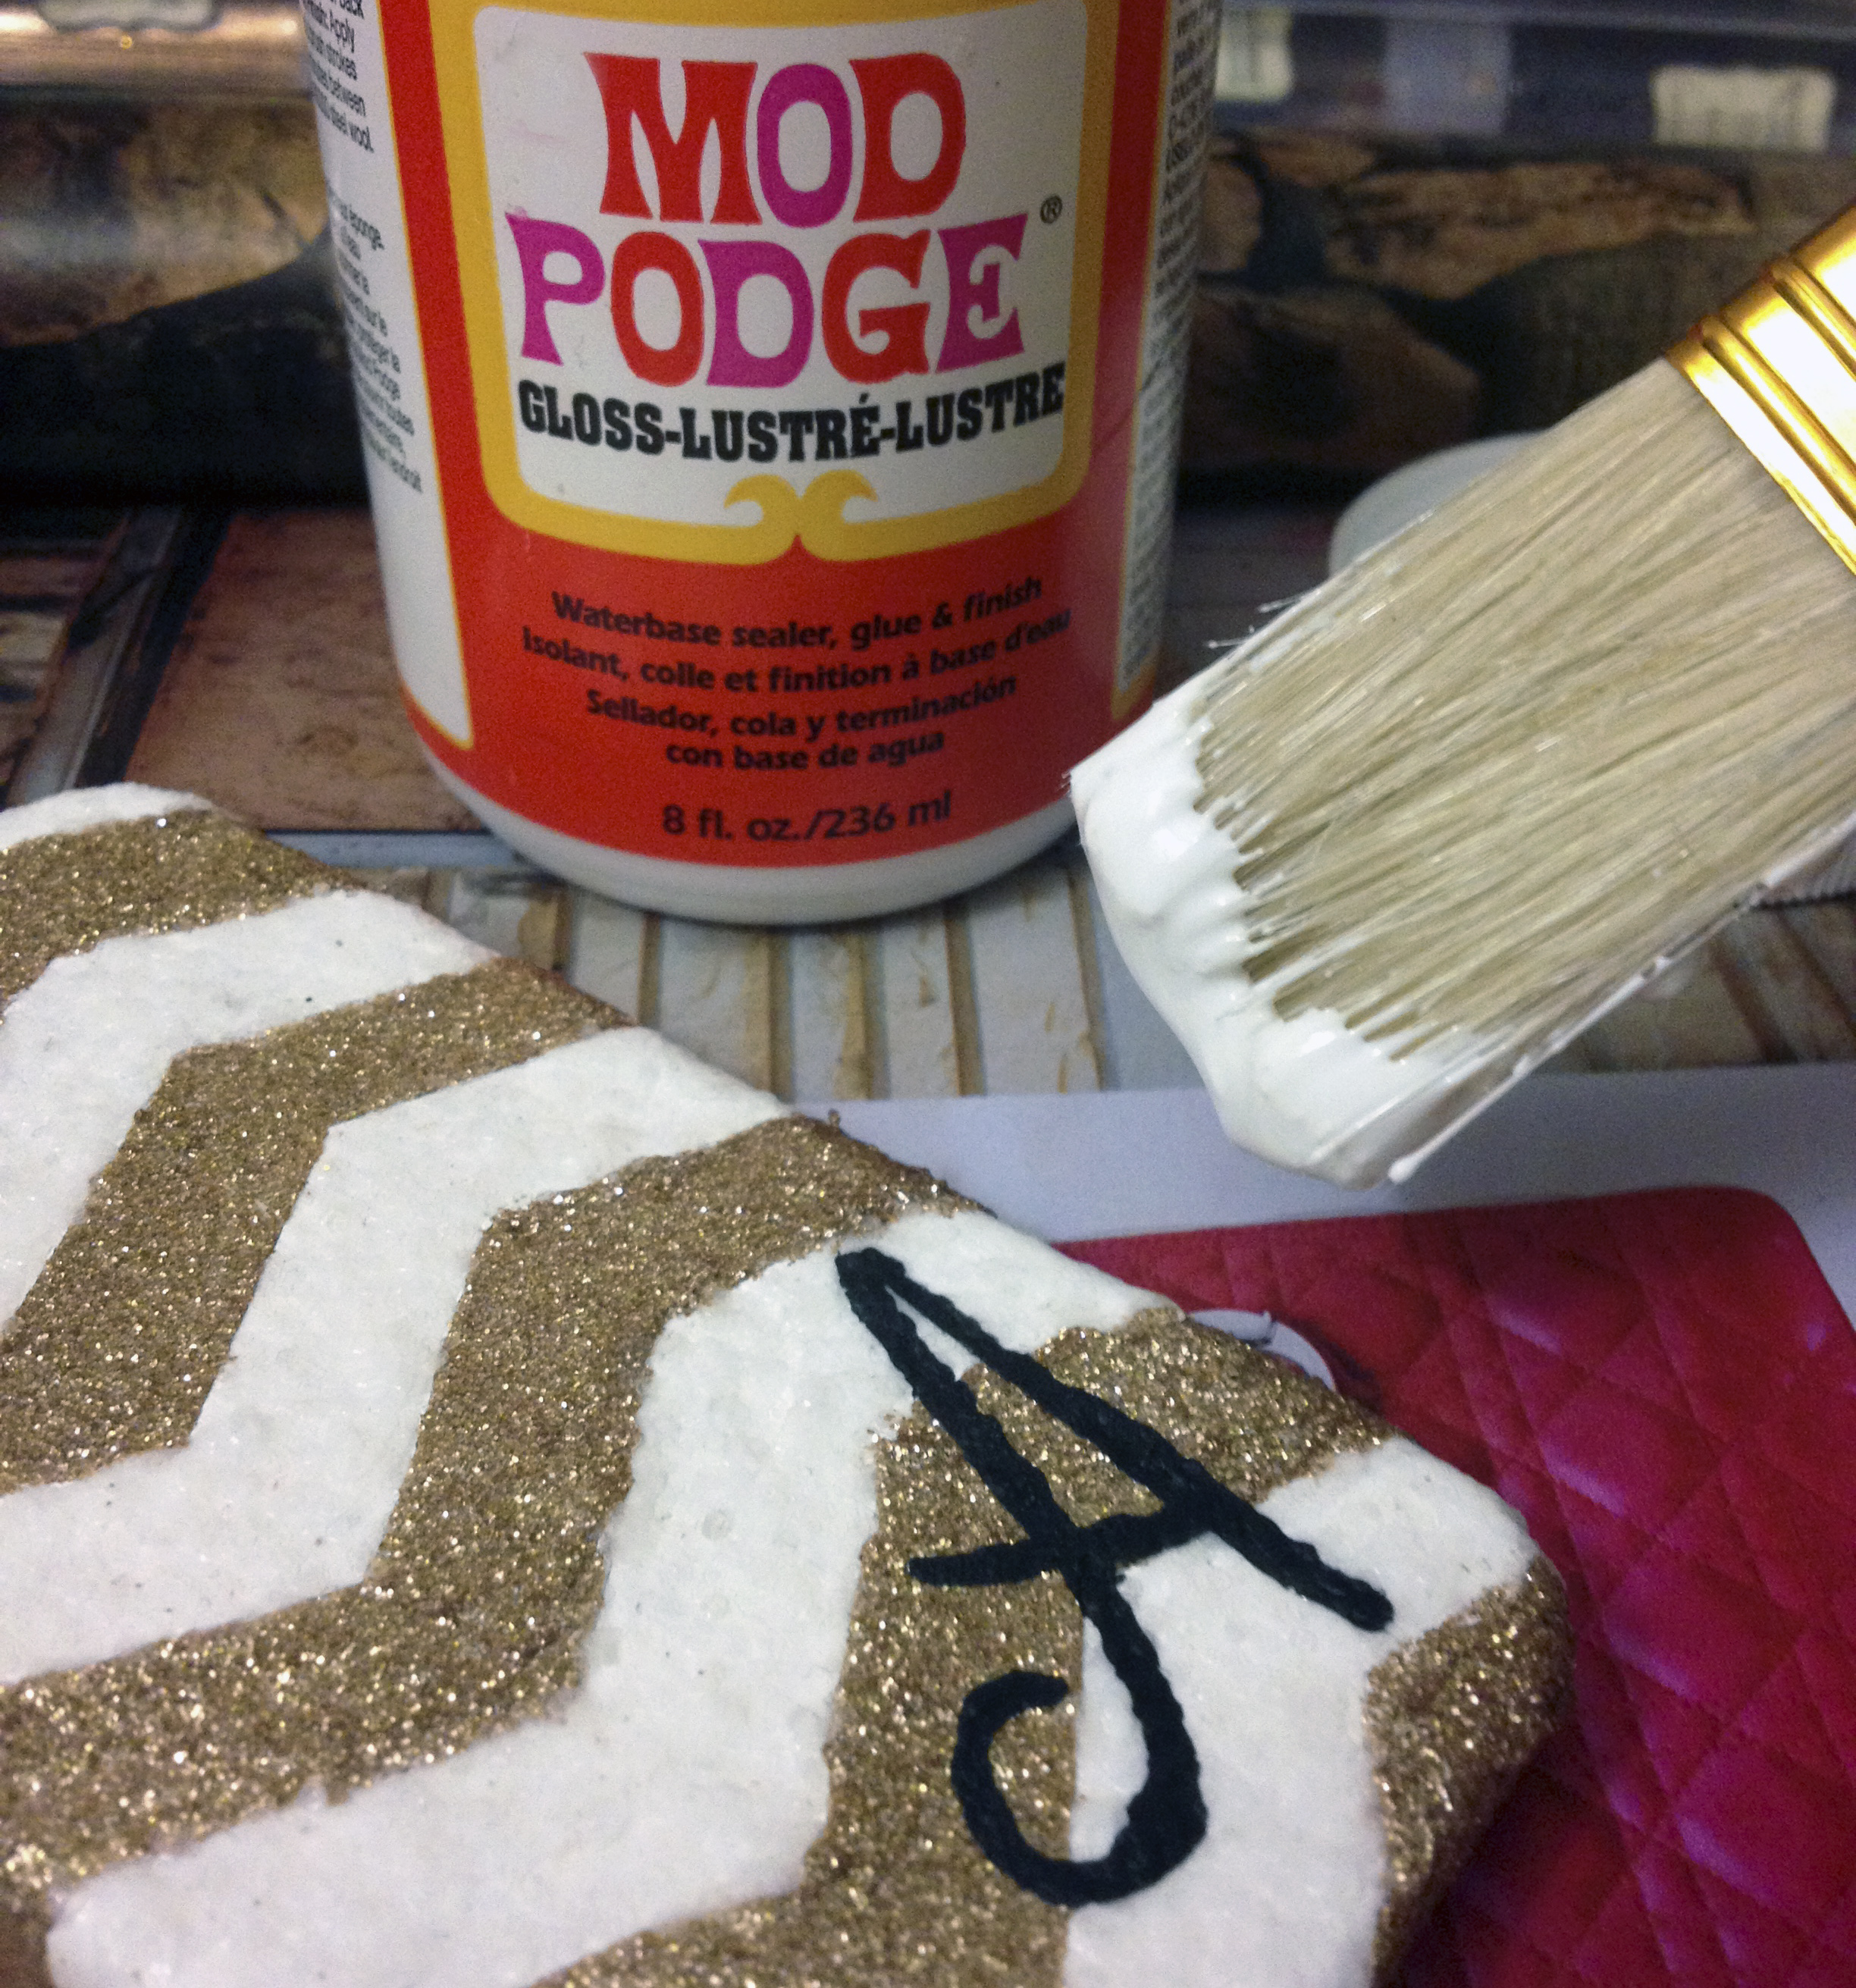
After the paint dries, seal the whole thing up with one last layer of just Mod Podge and allow to dry overnight. When morning comes, you'll have a brand new one-of-a-kind personal phone case in place of the old you had just one day before!
If you try this or a variation of this, I'd definitely love to see your results so be sure to share!
-----
Note: This post is part of DailyBuzz Style's November 9x9 challenge!


2 comments:
This almost makes me want to jump into the 21st Century and get a phone that I care about enough to use a case on :)
so cute! I love the glitter and the pattern you chose! Great work lady!
xx
Post a Comment